If you are coming from the Windows world and are relatively new to the Linux world, then these essential tools will be of great help to get you started and make your life easier. I will walk you through what each of them does in plain English & how you can set them up in a step-by-step approach. This is by no means an exhaustive list - this post is purposefully oversimplified, the goal is to get you started with Linux as fast as possible.
-
Windows Subsystem for Linux
-
Windows Terminal
-
TMUX
Windows Subsystem for Linux (WSL)
What does it do ?
The Windows Subsystem for Linux lets you run a Linux environment and most Linux command-line tools, utilities ( like TMUX, VIM, EMACS etc) and applications – directly on Windows without really deploying a VM.
How to set this up ?
- Step 1 - Enable Feature - You would need to enable the feature from PowerShell. (Run as administrator - will need a restart)
Enable-WindowsOptionalFeature -Online -FeatureName Microsoft-Windows-Subsystem-Linux
-
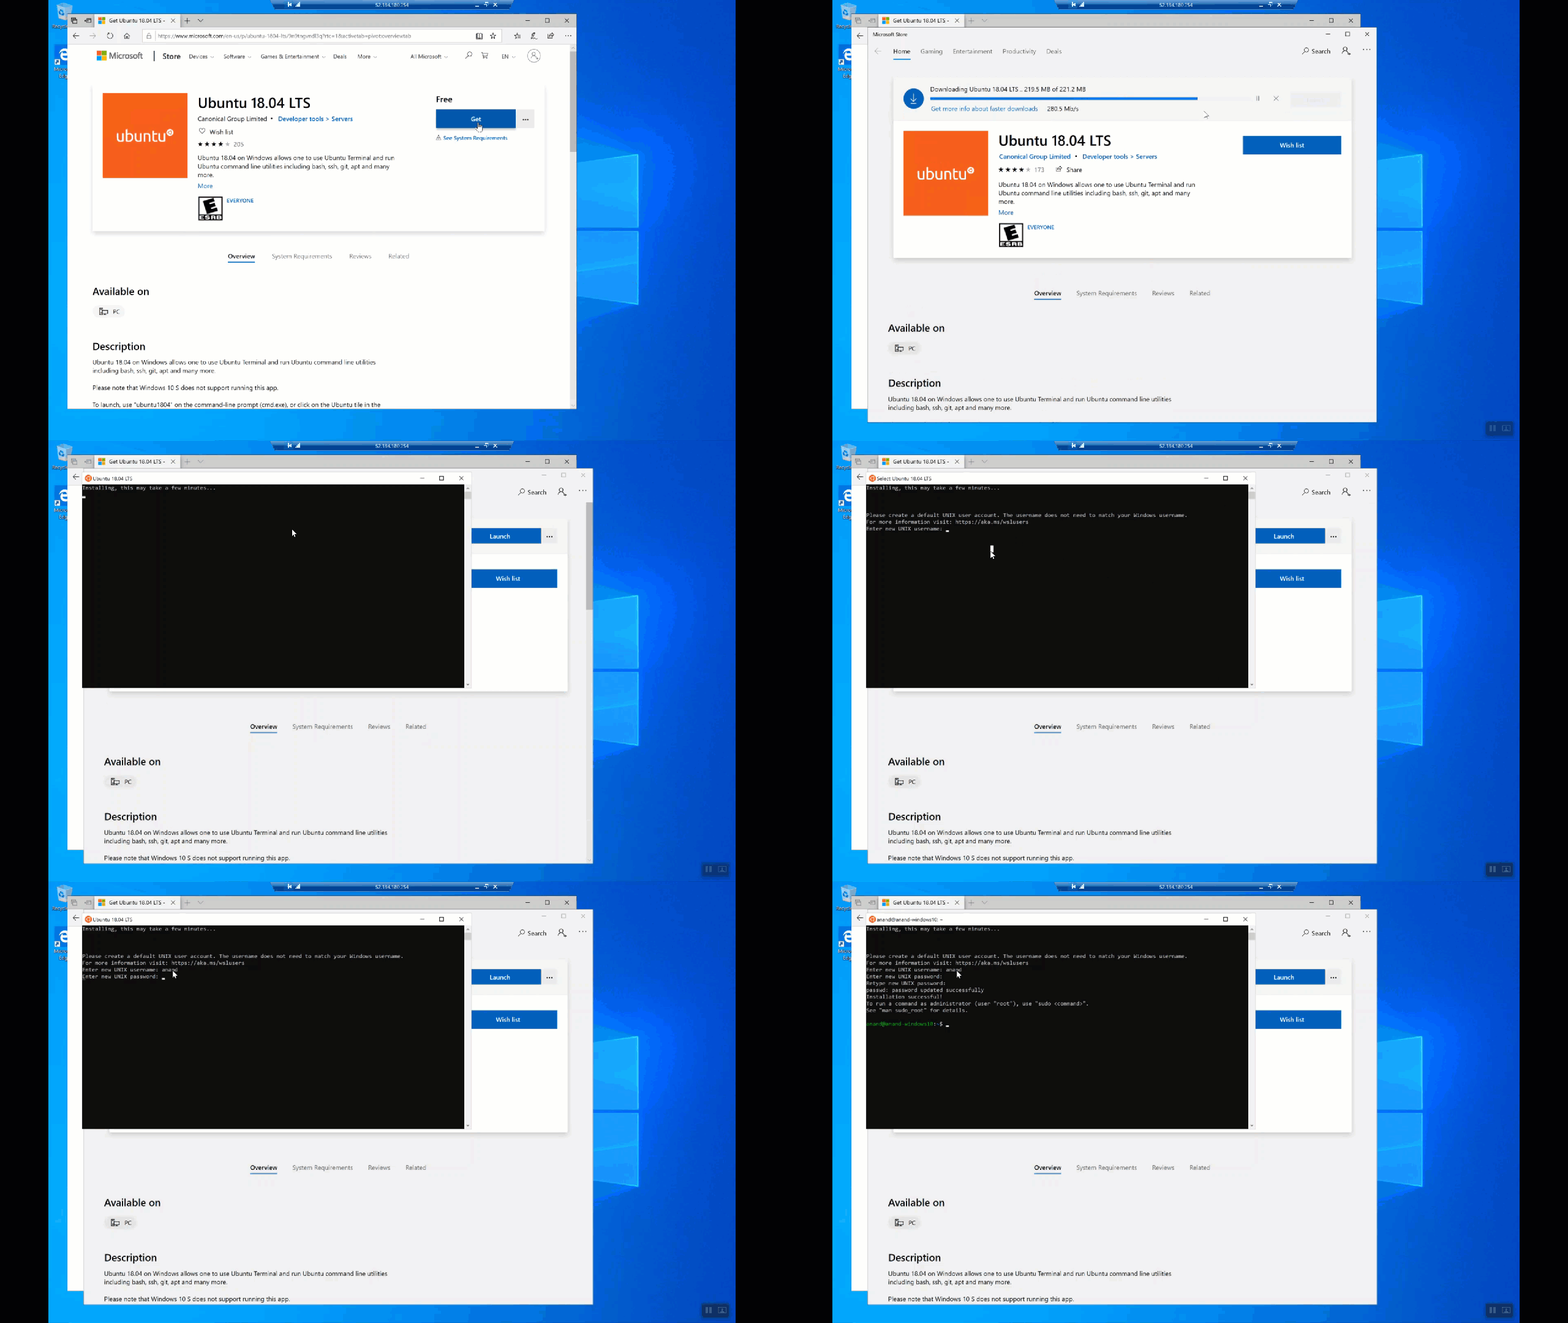
Step 2 - Pick Distribution & Complete Install - Here is the list of the distributions of Linux that you can install using the Microsoft Store:
I chose Ubuntu 18.04 LTS for my example. You can complete the installation by providing the user name and password for your instance:
-
Step 3 - Upgrade the packages - Run the following commands to upgrade the packages
sudo apt-get update
This command does not automatically install new versions of the software. It updates the package lists index - for packages that might need an upgrade or new packages that might just fetches the list of update packages ( but does not download them yet)
sudo apt-get upgrade
This command downloads the latest packages based on the previous update list
Please note that this is not WSL2 ( this is the older version WSL1). The newer version is a whole new product you can find more info here
Windows Terminal (preview)
What does it do ?
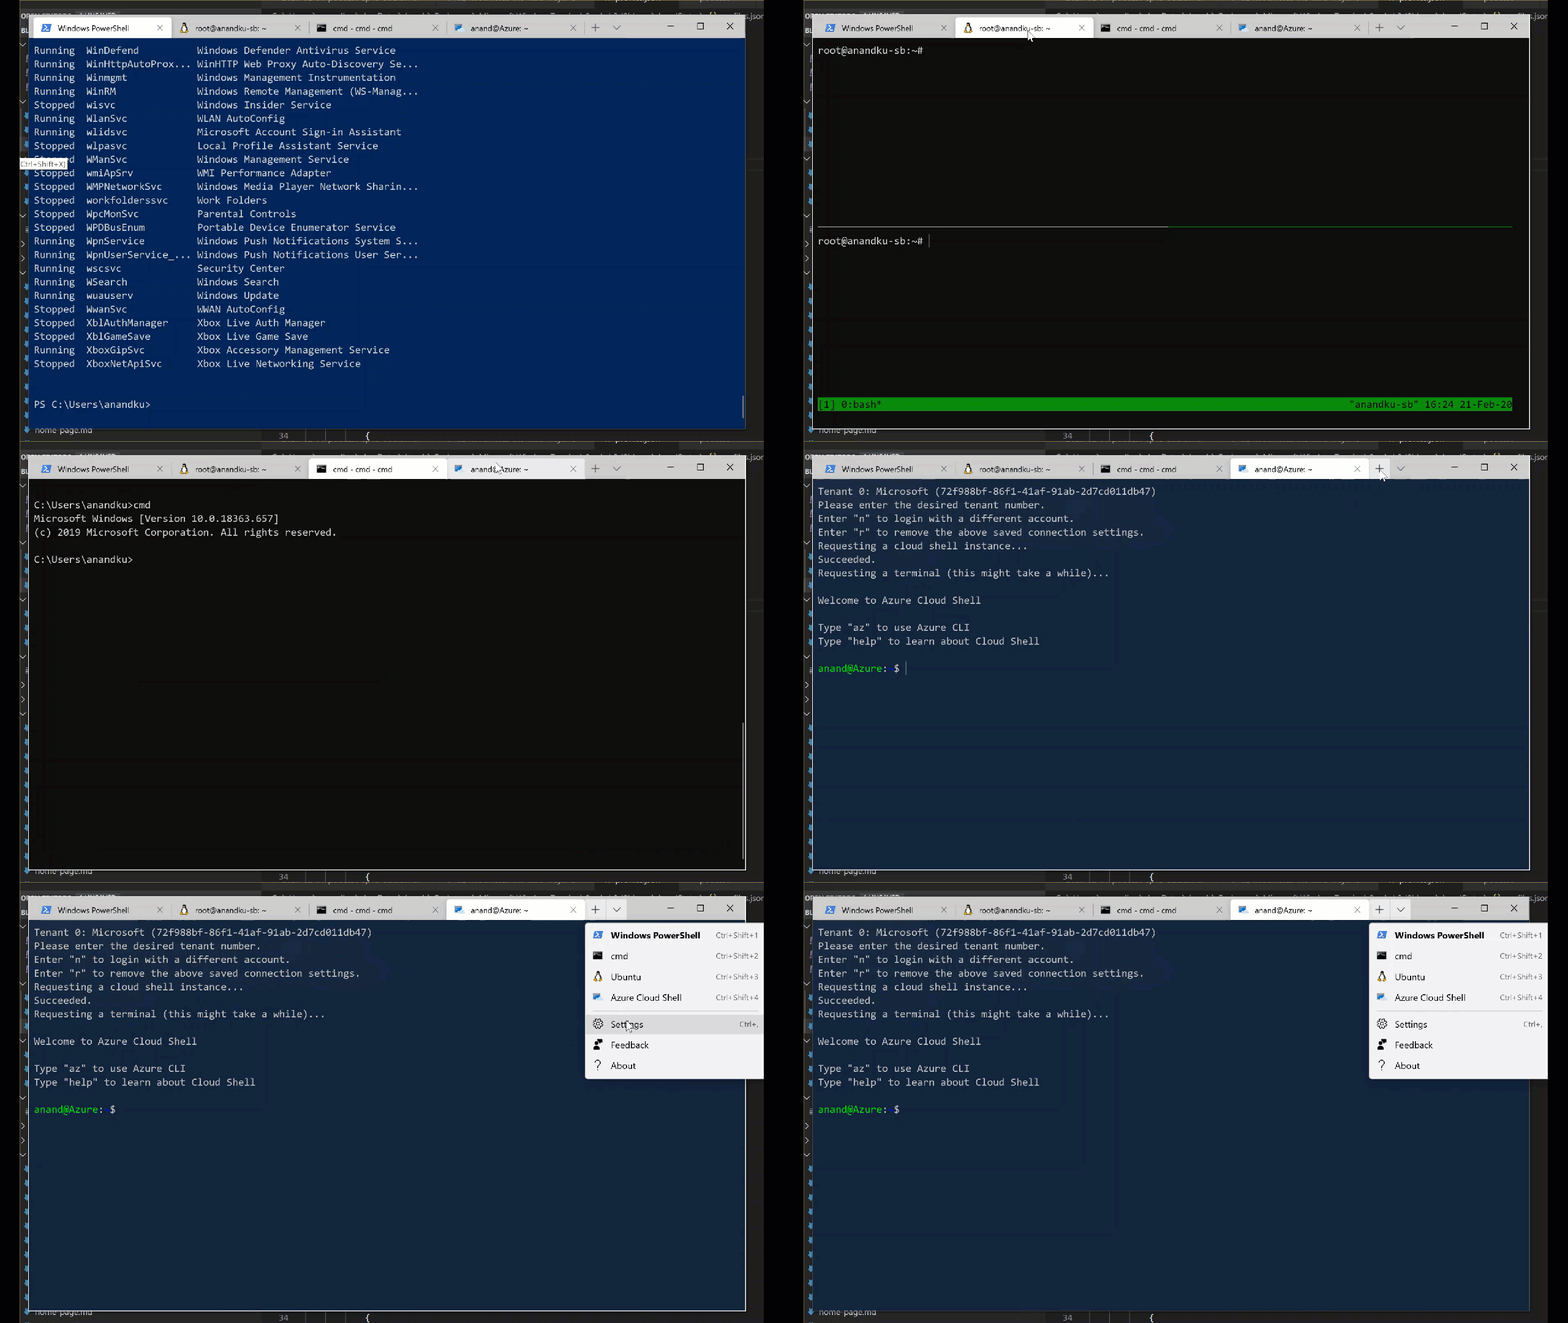
Once you have the WSL setup, the next thing is to install “Windows Terminal”. Your productivity will skyrocket once you install this and you can thank me later :) You can have multiple sessions of PowerShell, WSL, Good old command prompt, Azure Cloud Shell and much more ( this is super configurable) - all in ONE SINGLE TERMINAL !!
You can also type in “code” inside the bash shell to open up Visual Studio Code with the Remote WSL functionality and start developing in a Linux environment within Windows.
How to set this up ?
This is pretty straight forward to setup - you can either download from the Microsoft Store (or) you can download directly from the GitHub repository What’s more you can also customize the background, image, transparency and more using the profiles.json under the settings option.
TMUX
TMUX is a terminal multiplexer. When I first heard the definition I wasn’t very thrilled - but once you see what can be done with this, trust me you will love it ! (and once again productivity= skyrocket!)
What does it do ?
TMUX has three important components:
- Sessions
- Windows
- Panes
I’m not going to talk about Sessions in this post - but in short if you want to save your sessions this is helpful especially if you remote SSH often.
Windows - You can think of Windows as separate tabs in your browser. But windows are their own clients which allows flexibility on how you handle windows. You can attach and detach different windows in different sessions without any issues.
Firstly to get started with TMUX all you need to do is type in tmux from the shell prompt. And TMUX has a default key which is prefixed before any command –> Ctrl + B
If you dont like the default you can always change this by putting the following in *~/.tmux.conf*: set -g prefix Ctrl-X if you prefer
| Command | Action |
|---|---|
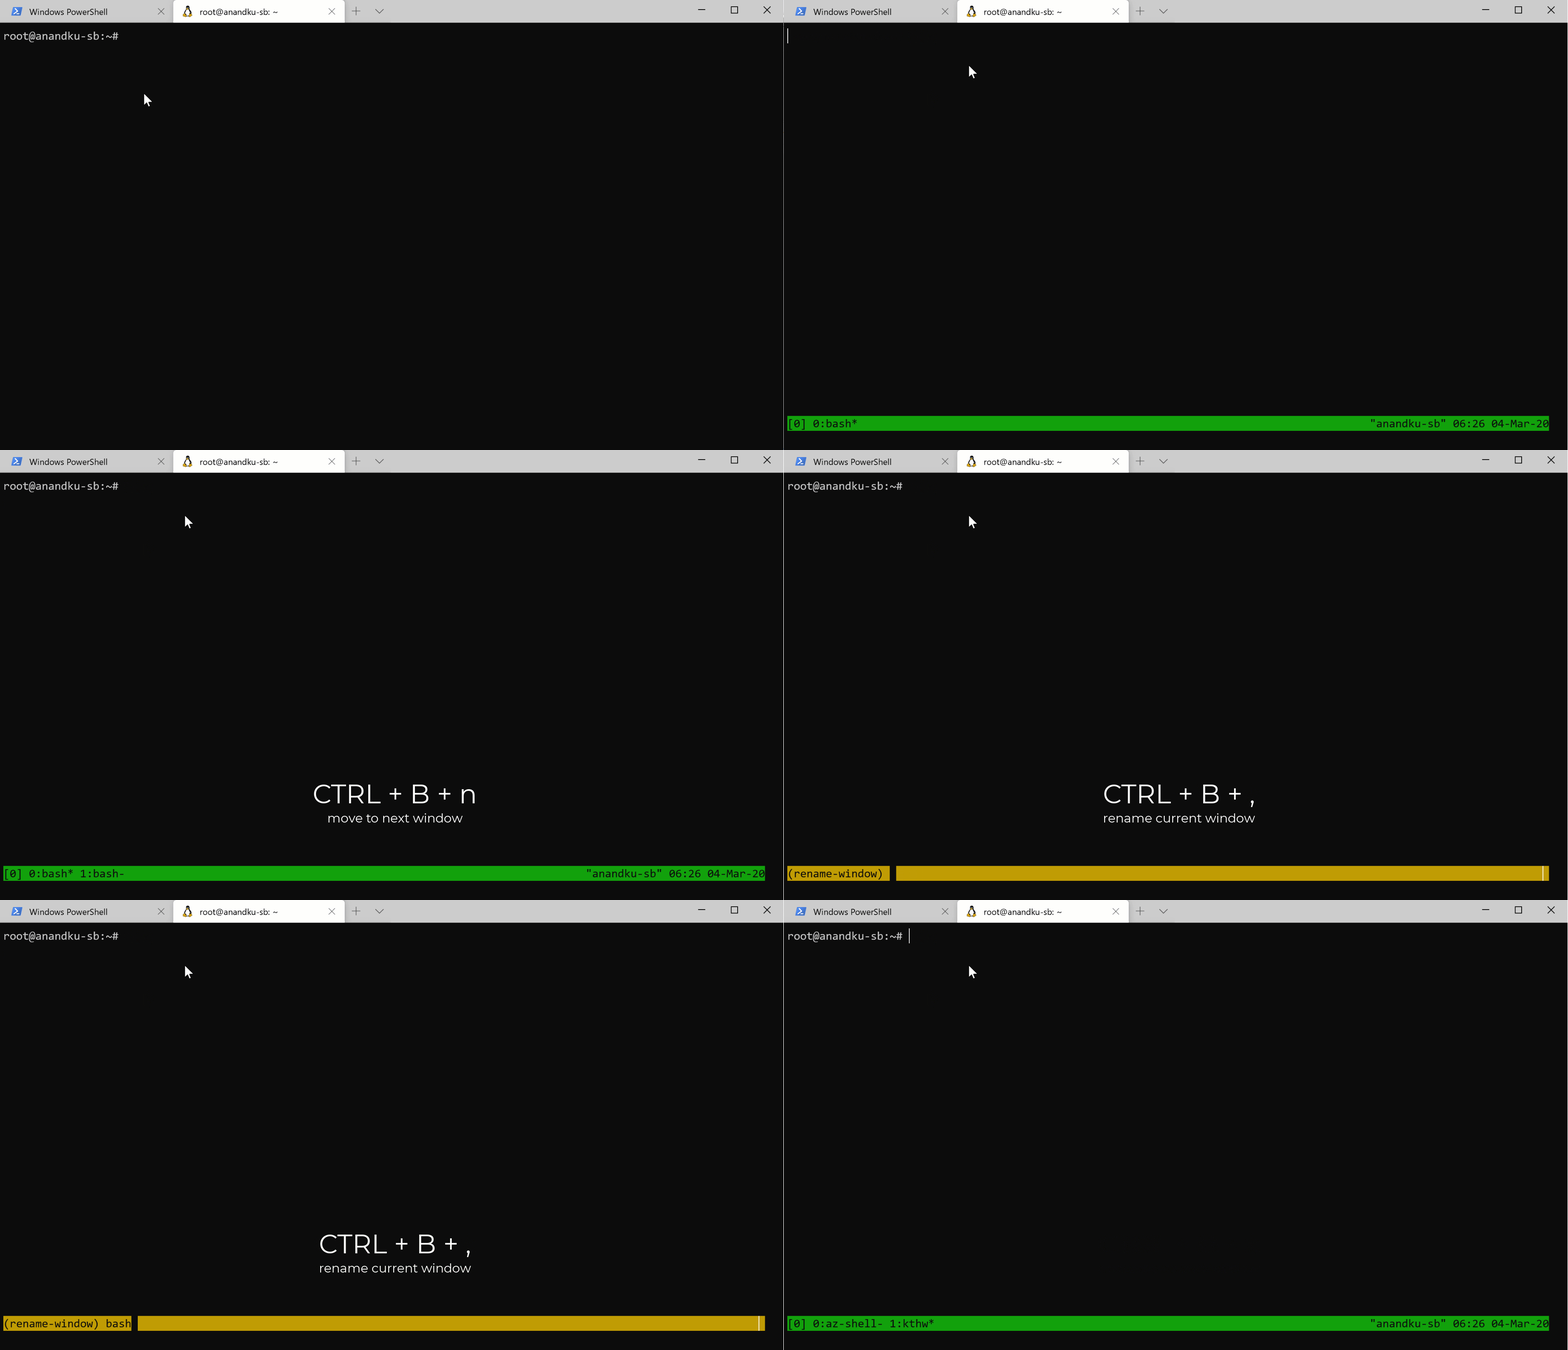
| Ctrl + B + c | Creates a new window |
| Ctrl + B + l | Switches to previous window |
| Ctrl + B + n | Moves to next window |
| Ctrl + B + , | Renames current window |
Not so thrilled yet? I wasn’t too - but stay with me, Panes and the ability to synchronize across panes is the best part of TMUX for me personally
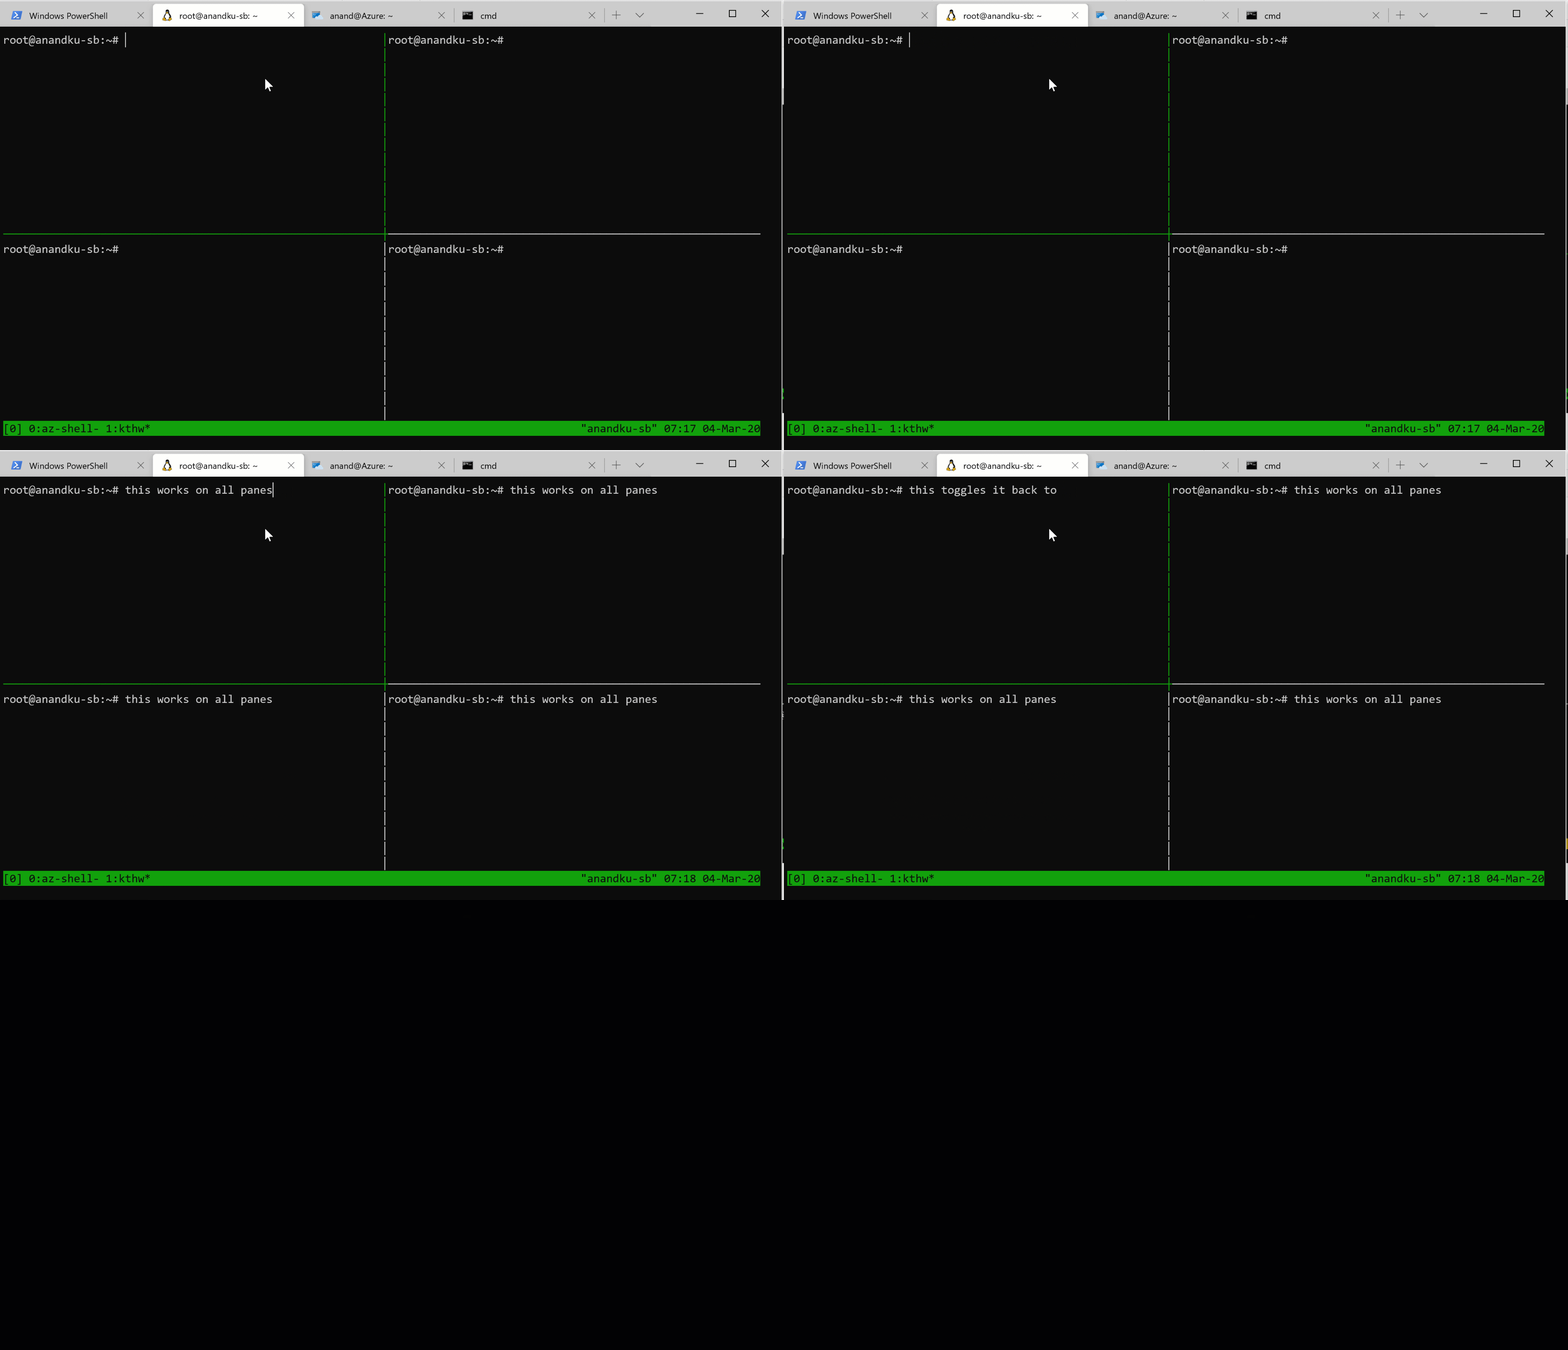
Panes - Panes let you split the current window both horizontally, vertically and resize if required and switch between different pane contexts easily. Also the best part “synchronize panes” you can type a command once and you will see it synchronized across all the panes together.
| Command | Action |
|---|---|
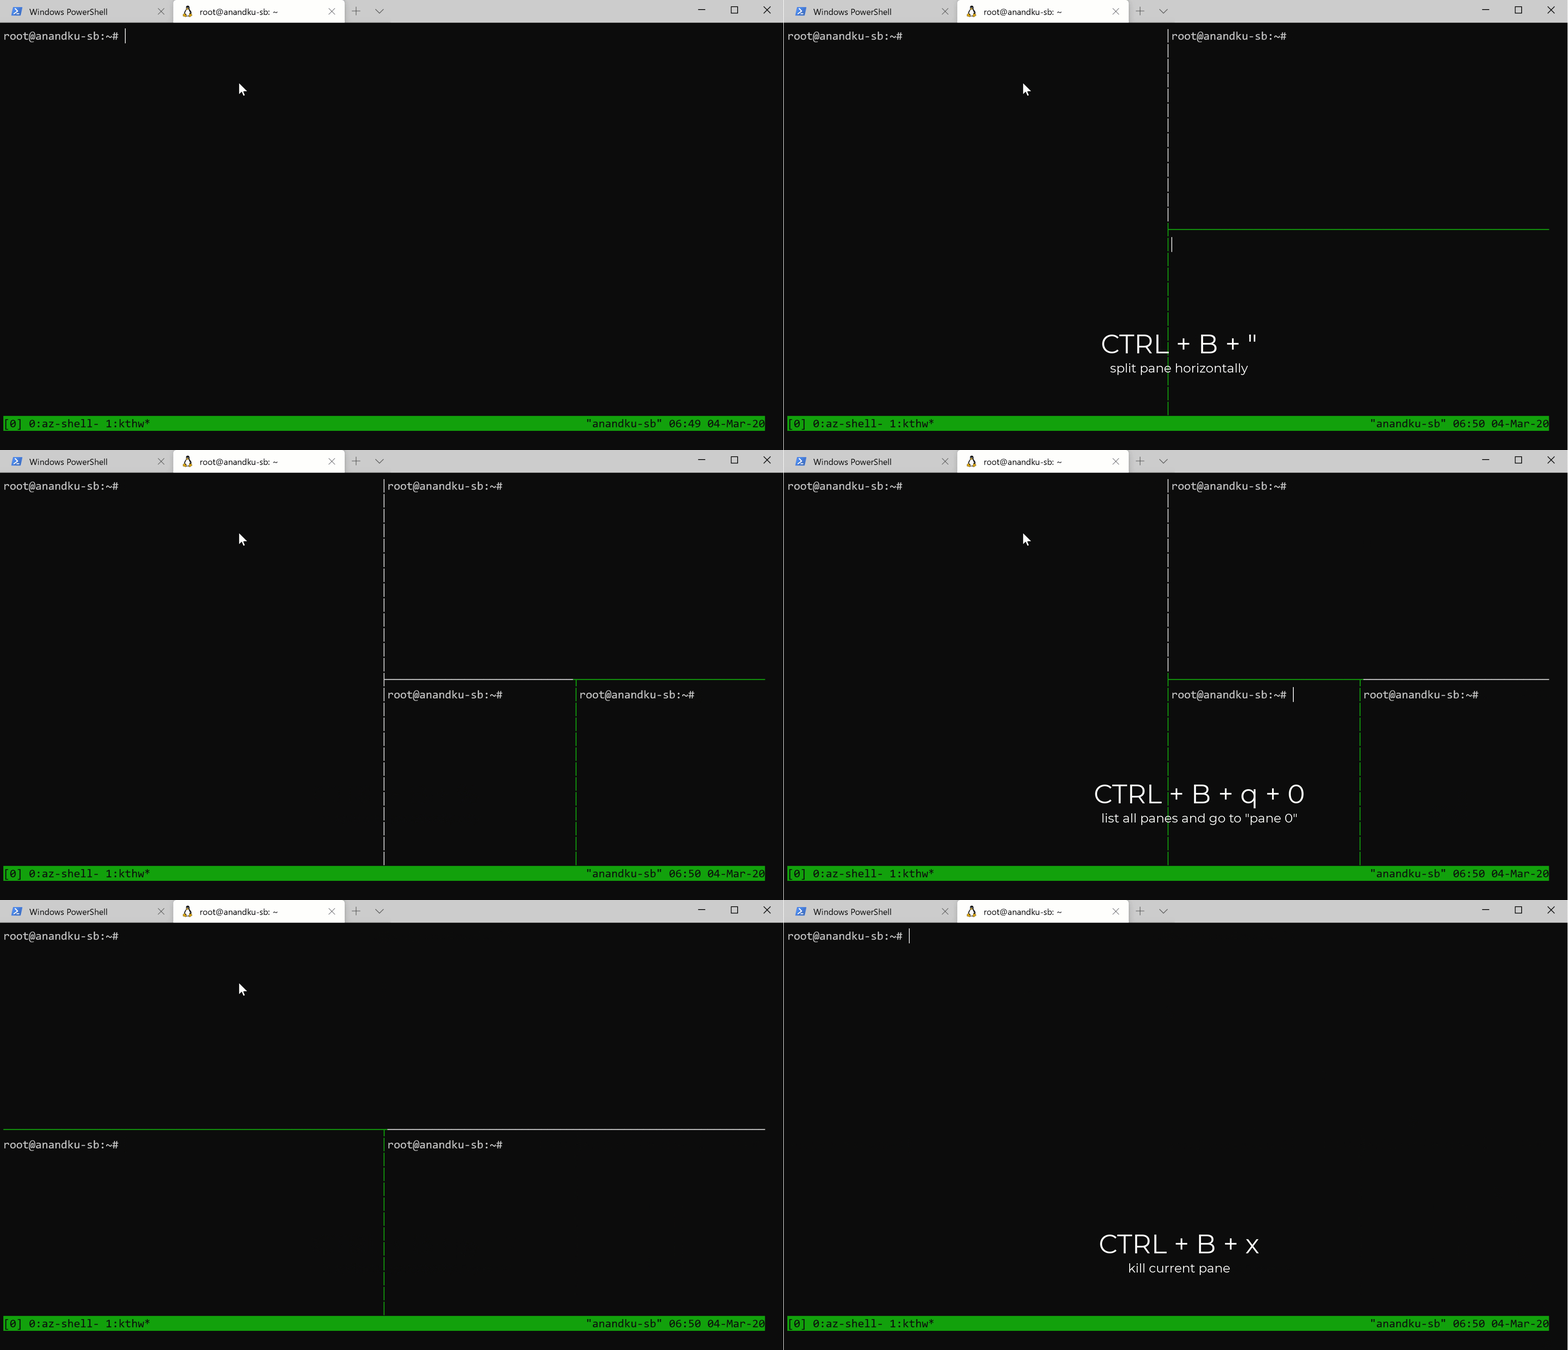
| Ctrl + B + % | Split current window into two vertical panes |
| Ctrl + B + “ | Split the current window into two horizontal panes |
| Ctrl + B + q | Lists all the pane numbers. Follow that up with the pane you want to work in. For example. Ctrl + B + q will list panes 0, 1 and 2. Immediately follow the Ctrl + B + q command with the pane number |
| Ctrl + B + x | Kills current pane |
And as promised the last command that made me love TMUX :
Ctrl + B + :
Once you get the prompt type in setw synchronize-panes ( you dont have to type it in full, you can hit the tab to autofill)
What this does is lets you type the command once and execute it across multiple panes - especially useful when you have SSHed into different machines on different panes and you want to run the same command everywhere.
This is by no means an exhaustive list of TMUX commands - I have only focused on the essential commands For a complete exhaustive list - refer this


Leave a comment